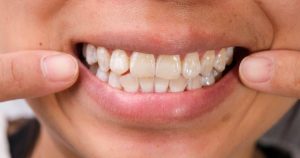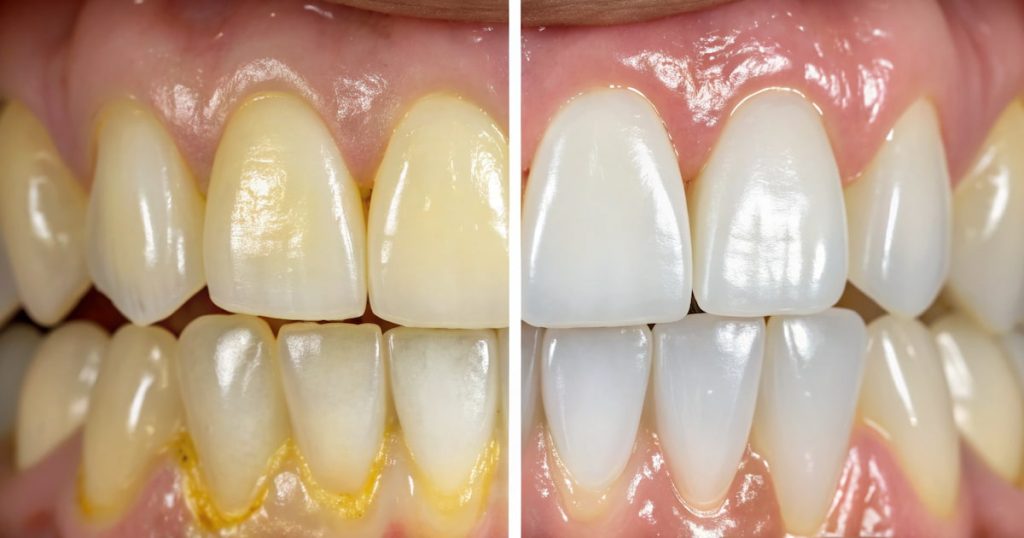
A sparkling white smile can boost your confidence in an instant. But not everyone wants to splurge on expensive in-office teeth whitening treatments. Fortunately, DIY teeth whitening offers an accessible and cost-effective way to enhance your smile from home.
Baking soda, hydrogen peroxide, whitening toothpaste, and oil pulling are among the safest and most effective at-home methods. However, some DIY tricks, like using lemon juice or activated charcoal, can be harmful.
Whether you’re looking for fast results or gentle, natural approaches, this guide walks you through everything, from proven methods to critical safety tips, so you can achieve a brighter smile without harming your teeth.
Effective At-Home Teeth Whitening Methods
When done right, at-home whitening can deliver impressive results. Here are the top methods people use to get a whiter smile at home:
Whitening Toothpaste and Mouthwash
These products are ideal for beginners. Whitening toothpaste contains mild abrasives and sometimes small amounts of hydrogen peroxide to gently polish away surface stains. Whitening mouthwashes often contain low levels of bleaching agents to enhance daily oral care.
Keep in mind that these methods work slowly but steadily, great for maintenance rather than dramatic results.


Whitening Strips and Gels
A popular choice among DIYers, whitening strips are coated with peroxide gel and adhere to your teeth for 20–30 minutes. Whitening gels typically come with a small brush for targeted application.
Users often see brighter teeth in about a week, but be cautious: overuse can lead to enamel damage and tooth sensitivity. Stick to the recommended duration and frequency.

LED Whitening Kits
LED kits combine peroxide gel with blue light to speed up the whitening effectiveness. They’re ideal for people looking for quick results. However, more power doesn’t mean more safety. Always read instructions carefully and take breaks between treatments.
| Method | Strength | Speed of Results | Risk Level | Best For |
|---|---|---|---|---|
| Whitening Toothpaste | Mild | Slow (2–4 weeks) | Low | Daily maintenance |
| Whitening Strips & Gels | Moderate | Medium (1–2 weeks) | Moderate | General surface stain removal |
| LED Whitening Kits | Strong | Fast (a few days) | Higher if misused | Quick, noticeable results |
For more insights on natural whitening methods backed by research, check out this helpful guide from Healthline on how to whiten teeth naturally.
Benefits of Whitening Teeth at Home
Whitening your teeth at home comes with several unique advantages. First and foremost, it’s affordable. Over-the-counter teeth whitening products are much cheaper than professional treatments and can deliver noticeable results over time.
Convenience is another key benefit. You can whiten your teeth while watching TV, reading a book, or getting ready for bed. Whether you choose whitening toothpaste, strips, or home remedies like baking soda, the flexibility is unmatched.
If you’re cautious about chemicals, many at-home options use natural ingredients. These can gently remove dark teeth stains without harsh bleaching agents, giving you more control over what goes in your mouth and on your enamel.
Want a Whiter Smile? Let the Experts Help!
✅ Safe & effective professional whitening treatments
✅ Instant results, up to 8 shades whiter!
✅ Gentle, dentist-approved formulas to protect enamel
📞 Book a consultation today and let’s brighten your smile!
Safety Tips for At-Home Teeth Whitening
Whitening your teeth at home should never come at the cost of your dental health. Here are key tips to protect your oral hygiene and avoid whitening risks:
- Follow the instructions on any product; never exceed the recommended usage time or frequency.
- Limit treatments to a few times per week. Overuse can wear down your enamel and cause sensitivity.
- Avoid eating acidic foods and drinks after whitening, when your enamel may be more porous.
- Use fluoride toothpaste to help strengthen enamel between treatments.
- Monitor how your teeth feel. If you notice pain, tingling, or discoloration, stop immediately and consult your dentist.
Pro tip: Your enamel doesn’t grow back. Always prioritize safety over speed when whitening your teeth at home.
Common Mistakes to Avoid During Teeth Whitening
Even well-meaning attempts can go wrong if you’re not careful. Here are the top mistakes to avoid:
- Overusing whitening products. More doesn’t equal better, it increases the risk of enamel damage and sensitivity.
- Combining multiple whitening methods at once. This can overload your teeth and cause pain or uneven results.
- Using acidic “natural” remedies like lemon juice or vinegar. While they sound harmless, their high acidity can erode enamel quickly.
- Neglecting basic oral hygiene. Whitening only works on clean teeth. If you skip brushing or flossing, stains and plaque will return faster.

Final Thoughts
DIY teeth whitening can be a safe, affordable way to get the smile you’ve always wanted, if you do it right. Choose methods that suit your needs, avoid common mistakes, and always prioritize your enamel’s health. With a little consistency and care, you’ll notice the difference in no time.
FAQs
-
How can I whiten my teeth at home without damaging them?
Stick with trusted, ADA-approved products and avoid excessive use. Baking soda and peroxide in small, controlled amounts can be safe when used correctly. Never scrub hard or use acidic substances.
-
What is the safest method to whiten teeth?
Whitening toothpaste and strips with low peroxide concentrations are typically the safest. Natural approaches like baking soda (used gently) are also low-risk for most people.
-
Can yellow teeth turn white again?
Yes! Especially if the yellowing is from surface stains caused by food, drink, or smoking. Regular whitening treatments, paired with proper oral hygiene, can lead to significantly whiter teeth.
-
How fast does baking soda whiten teeth?
Baking soda is not a quick fix. It can begin removing stains after a few uses, but visible results may take 2–4 weeks. It’s best used as part of a consistent routine.
Need Help Choosing a Whitening Method?
Drop your questions in the comments below, we’re here to help!